November 2019
Note from President Dave
Greetings to all !
Cooler weather and rain at last, let’s enjoy the fall season.
We are 10 months into our 30th year. October was pretty much a normal month. All activities moved along very well. A beta version of the new web site is operational, but major changes and additions are ongoing. Dee and Dave are continuing to work toward the goal of having our library catalog program accessible locally and on our new website in the near future.
Donations came in at a slower pace throughout the month. Thanks to Dave Cisco and Mike Lord, the recently donated, rare, E. H. Scott communications receiver has been restored to operation.
Wosrk at the shop has been steady with items being repaired and returned to owners. Those members who attend the electronic classes should check the posted schedule on the bulletin board at the shop for the correct dates for the remainder of the year.
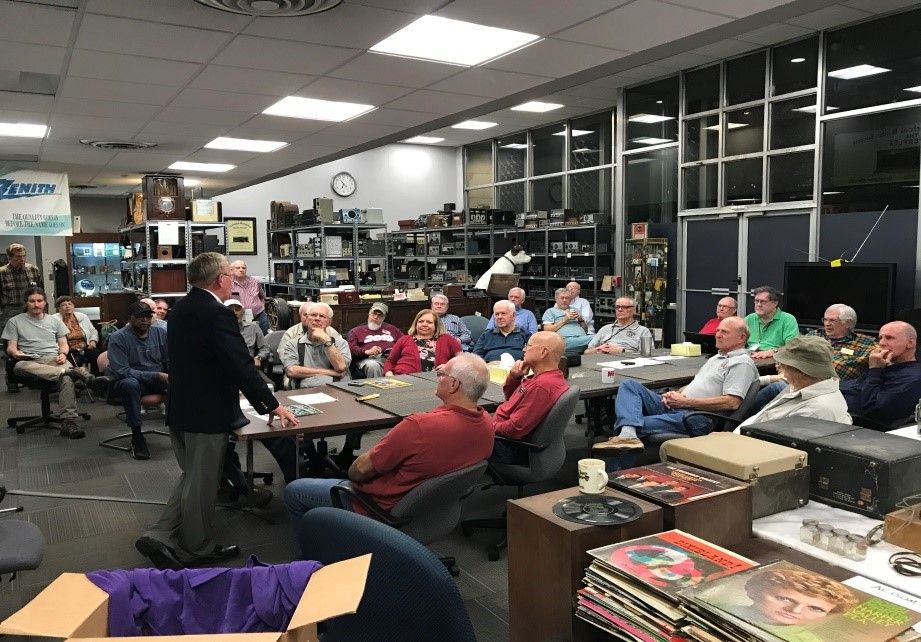
The September members only silent auction cleared out all available items. Since there were only a few new items on hand, we planned a conventional meeting for October with Mike Royer; a well-known local broadcaster as our quest speaker. Most of you remember Mike from local television Channel 13. He now works for television station WVUA, a part of the University of Alabama Communications Department in Tuscaloosa. His work involves teaching students the art and science of on-the-air broadcasting. His program was excellent!!! He shared stories from his younger days on the family farm in Indiana and how he got his into broadcasting and eventually moving to Birmingham. He told of many interesting events and the inspirational people he interviewed throughout his long career, U.S. Presidents to the common man. Not only did he talk about broadcasting, but also offered many bits of wisdom everyone could use in their personal lives. Another interesting program is being planned for this month. Keep watching for more details.
That’s all for now.
See you at the shop.
Dave
What's Happening at the Society
Quote of the Month
Submitted by: Steven Westbrook
Human was the music,
Natural was the static.
- John Updike
Eclectic Technology
A New Tool for 21st Century Direction Finding
Submitted by Jim McCullers WA4CWI
The article below was written by AHRS member Jim McCullers and published in the November 2019 edition of the QST magazine from the American Radio Relay League (ARRL). The article appears here with the gracious permission of Jim McCullers and the ARRL.
Jim McCullers, WA4CWI, has developed a clever smartphone app specifically designed for Amateur Radio direction finding. I’ve invited Jim to describe his SigTrax app for this month’s column.
- Steve Ford WBBIMY
The science and practice of radio direction finding (otherwise known as signal tracking or fox hunting) dates from the earliest days of radio.
The advent of GPS and smart devices with cellular tracking capabilities has led many to believe this activity is no longer relevant, but nothing could be further from the truth. While these technologies have made signal tracking easier, they are subject to failures that still require the application of basic direction -finding techniques. As a result, law enforcement and public utilities, among others, routinely ask hams to put their signal-tracking skills to work.
Keeping Our Skills Sharp
Signal tracking must be learned, and once learned, it is a competency that must be kept up to date. That’s why many clubs conduct foxhunts. In its most basic form, a foxhunt involves a club member who takes a transmitter (the fox) to a distant location and activates it at a specific time. The hunters then begin their search. The first person or team to find the fox is the winner
Foxhunters are equipped with two basic tools: a receiver and a directional antenna. The receiver can be a mobile radio or a handheld transceiver. Antennas range from handheld tape-measure Yagis and portable antennas to elaborate rotatable mobile mounts and Doppler arrays.
To be successful, the hunter often require additional tools such as a compass for bearing determination, maps covering the hunt area, and pencils, protractors and straight edges to plot bearing lines on the maps. Notepads are necessary to maintain a history of discovered bearings, especially if the signal hunting spans multiple days. It’s not uncommon to see trackers spending valuable time huddled over a spread out and well-worn paper maps attempting to plot new bearings and determine driving routes to a suspected fox location.
You’d think there would be a way to consolidate and enhance this unwieldy collection of tools. As it turns out, there is.
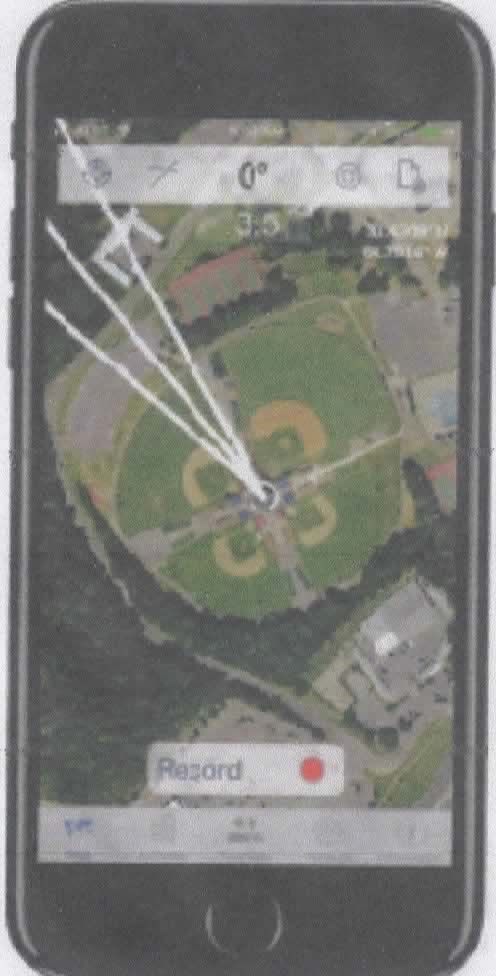
SigTrax
SigTrax, a mobile app for Android and iOS devices, was created to be a signal tracker’s toolkit combining high precision GPS locating, detailed mapping, a built-in compass and the computing power to instantly plot bearings and determine Crosspoints™ - locations where bearing lines cross, potentially pinpointed the location of a signal source. SigTrax includes driving maps complete with text and voice routing instructions to direct the tracker to the Crosspoint location.
Bearings can be entered into SigTrax in multiple ways. They can then be selectively viewed or deleted. Bearing collections can be saved as archives and retrieved at a later time, which is vital when tracking signals over long time periods.
• SigTrax+ brings optional purchasable features that further enhance the signal- tracking toolkit.
• SigShare™ allows bearings and archives to be displayed in a large format such as Google Earth.
• Doppler tracking users can use DataTrax™ as a smart interface with automatically inserted Doppler-generated bearings.
• Cooperative hunting, mode is particularly important in emergency situations. In this mode, multiple trackers from a TraxTeam™ can instantaneously share bearings information with the entire hunt group.
SigTrax is available on the Apple iTunes App Store for iOS devices and on Google Play for Android devices.
When is a Radio to Far Gone to Restore?
Submitted by Doc Holladay
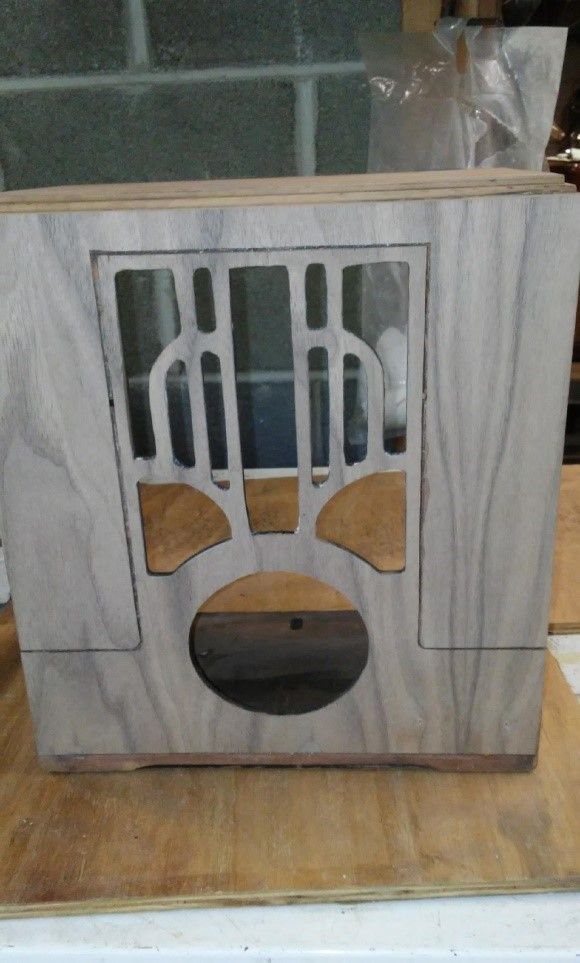
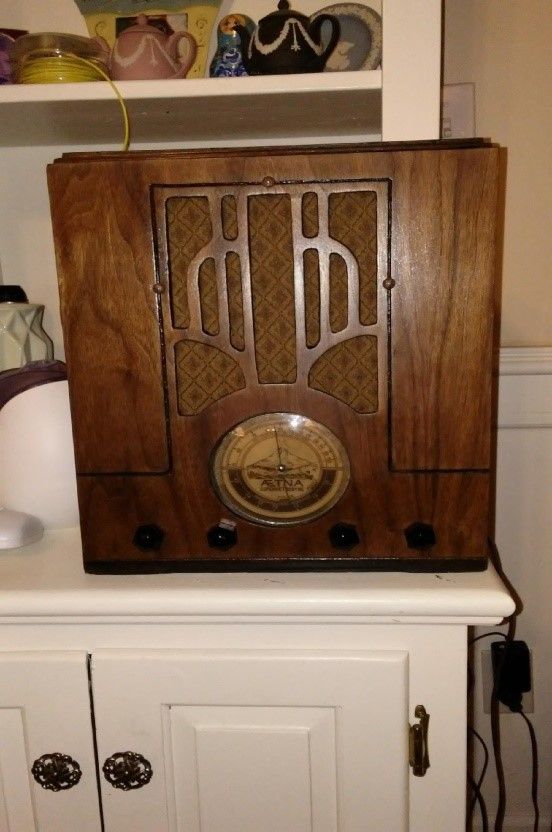
When is a radio too far gone to restore? Well, that depends on a couple of things - and a couple of definitions of "restored". Let's start with what it means to "restore" an old radio. Do you call it restored when you recap and get the chassis playing? When you refinish the cabinet to "like new" condition? Or both? For me, it's always the latter. I want the radio to be a looker and also to play well. When I get any old radio to restore, the first thing I do is a survey of the chassis and speaker. I don't want to spend my time refinishing a cabinet if there won't be a radio to put into it. And I won't bore you with how I check and restore a chassis- we'll leave that to the teachers at AHRS. So - the second order of business is the cabinet. How bad can it be and still be saved? I feel if it has 2 sides, a top and bottom and a front it can be worked on and brought back to decent shape, given enough time and effort. An example is this 1940 Aetna model 502 tombstone radio which was the radio brand sold by Walgreen's stores.
I received this radio along with 8 others in a swap and it was by far the worst of the lot. You can see the veneer is stripping off the front, and most of the grille scrollwork is broken off. There is also no veneer at all on the left side but we're going to re-veneer the whole thing anyway, right?

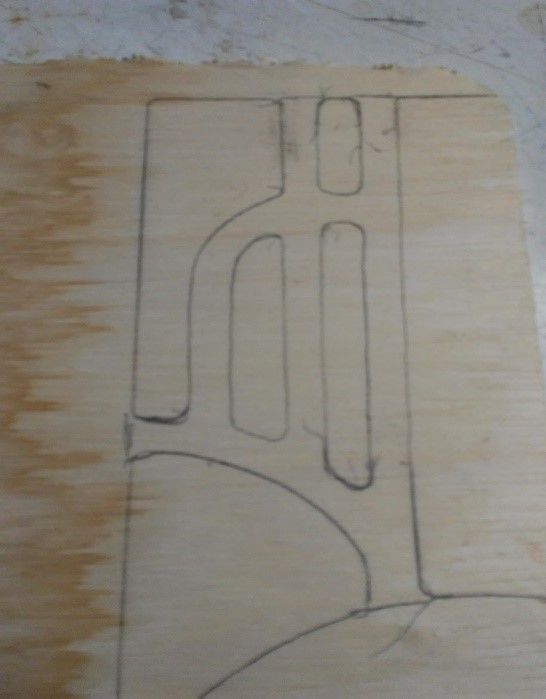
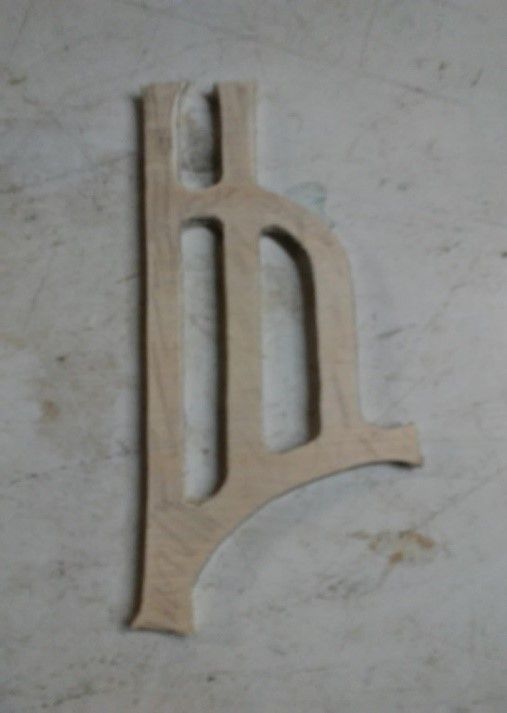
I started by laying the cabinet face down on a 1/8' piece of lauan plywood, very cheap at any big box store. I traced the grille side that was most complete and only had to freehand 2 straight lines. I used a coping saw to cut out the template, flipped it over and traced out the 2nd side. I left the ends just a shade long where they would glue into the grille frame so I could have a nice snug fit.
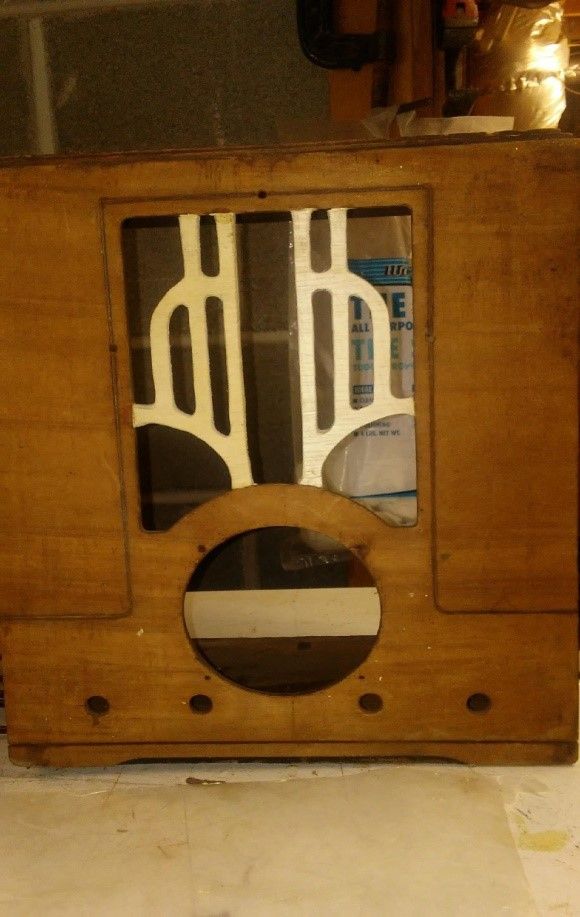
To re-veneer the cabinet I used one complete piece of veneer for the front and cut it along the lines where the black grooves would be. This is tedious and time consuming but it's well worth the effort. I also glued the sheet onto the front before cutting out the grille holes. When you go to cut the veneer in the holes, throw away that old exacto blade and use a brand new one because otherwise you run the risk of splitting the veneer along the grain instead of cutting it.
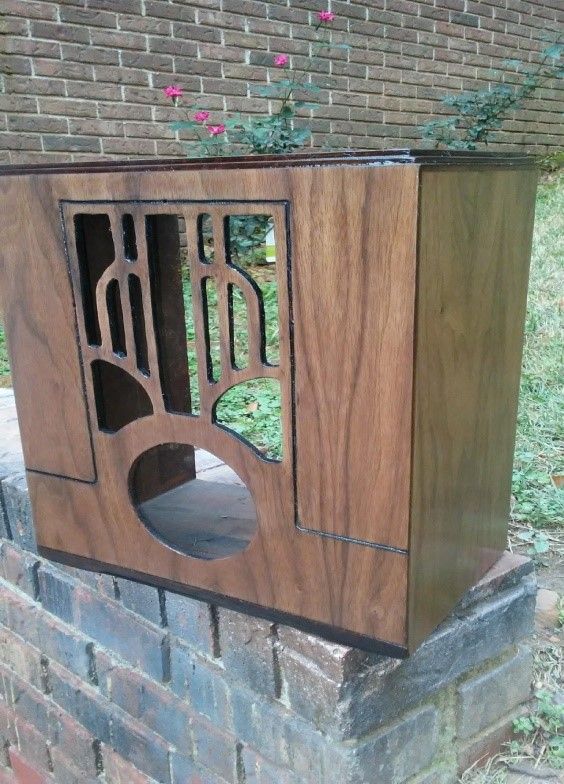
Time to grain fill! There are different ways to do this but I subscribe to the method used by the brilliant Tom Hayes. He uses two fingers and rubs the filler into the wood grain. It seems to get the filler into the pores better than using a credit card or putty knife. And you can use anything- well, almost anything- to grain fill. I have used oil based filler, water based filler, and even sheetrock mud and they all work. The easiest for me is water based and pre-stained filler. When the filler is dried and sanded, apply the toner and the color stain. Unless you're trying to exactly reproduce the original appearance, you can use any color you like. I use MinWax stain. The color on this cabinet is Golden Oak. The top and bottom strips are Mohawk Dark Walnut toning lacquer.
The final touch is a clear coat of lacquer. Actually, I apply three or four coats, letting each coat dry before putting on the next one. All that's left to do now is sneak the radio out of my basement workshop and into the house without my wife finding out. I have 12 already occupying various shelves and end tables. Maybe she won't notice one more.
If you haven't tried to restore a cabinet, find an old clunker that could be fixed up without a lot of trouble and give it a try. If you take your time and don't rush the process I think you'll be happy with the results.
Ugly Ducklings to Swans
Submitted by Ray Giles
I don’t know why but, given a selection of old radios to choose from l always seem attracted to the ugliest and/or nastiest. Lately, l have been drawn to odd shaped or colorful plastic or Bakelite models, the cheap when new version. My latest adventure was a very nasty white 1950 Motorola with an American flag sticker on top. It sure looked simple and unmolested so I started right in - new AC cord, checked all the original Motorola tubes (a good sign and they all checked good), and replaced the big filter capacitor that always eliminates the noise and makes music. Big surprise - no music, so I asked Dr. Dave Johnson for a diagnosis - bad news - not one, but both IF transformers were bad. Now this would ordinarily end the pain right there on a radio costing about $6.95 when new, but I knew that the cabinet and trim pieces had potential. So, I plunged ahead and proceeded to rob two IF transformers from one of our vast supply of carcasses from across the street. I pulled out the bad ones and slid in what I hoped were two good ones. Instead of music all I got was a bad hum. Now what - recapped it and - bad hum. I shortened all the wires, rechecked my solder joints - bad hum. Well this isn’t fun anymore. I’m ready to surrender, but my buddy Dee Haynes felt challenged and wasn’t ready to give up. He suggested we try a larger capacitor in the audio circuit. We replaced the original .25 mf cap with a .47 and virtually eliminated the hum. After a paint job and chrome polish, I now have a beautiful little Motorola that sounds great. I guess I’m just a sucker for blondes. Many thanks to Dave & Dee for their help.
Walking Through The Shop
Submitted by Steven Westbrook
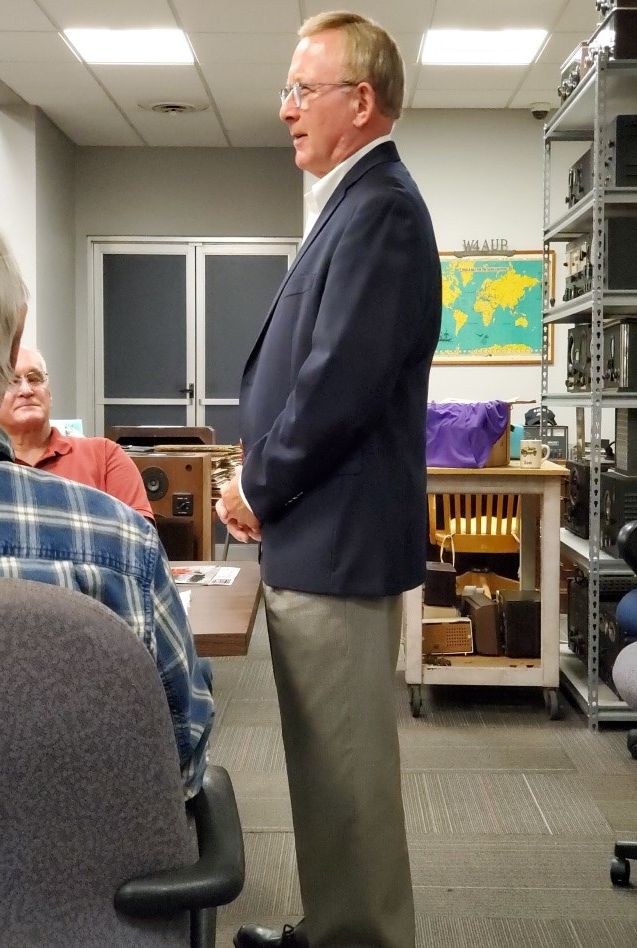
Mike Royer speaking at the Octover AHRS monthly meeting
Mike Royer and AHRS Members
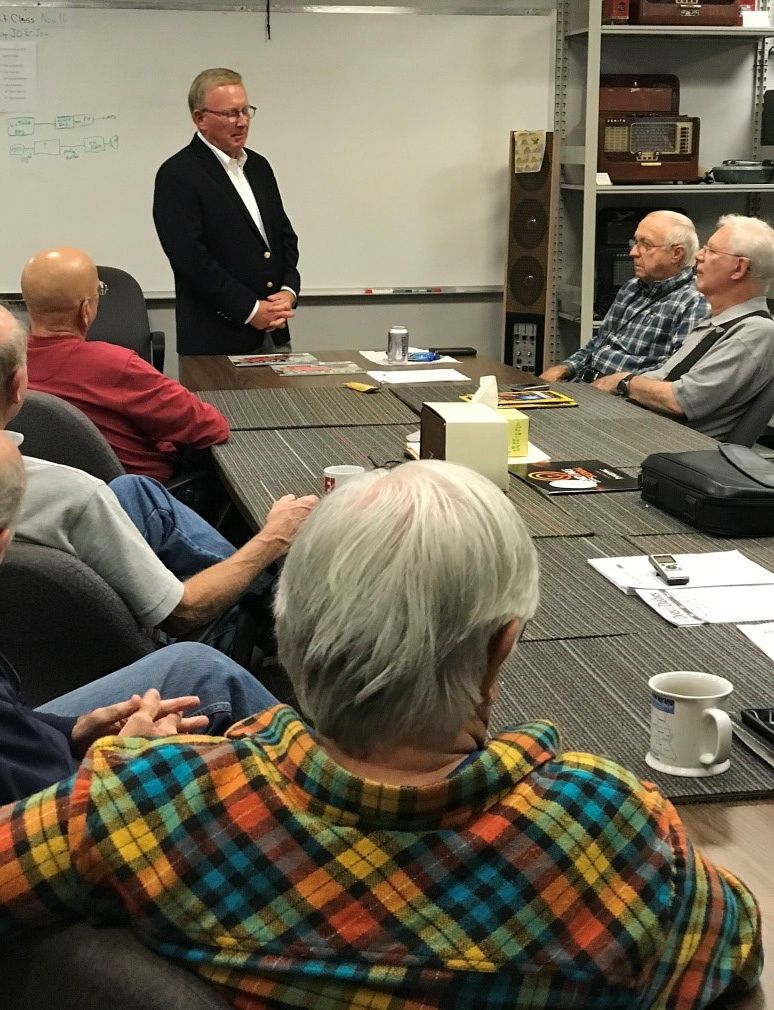
Mike Royer and AHRS Members
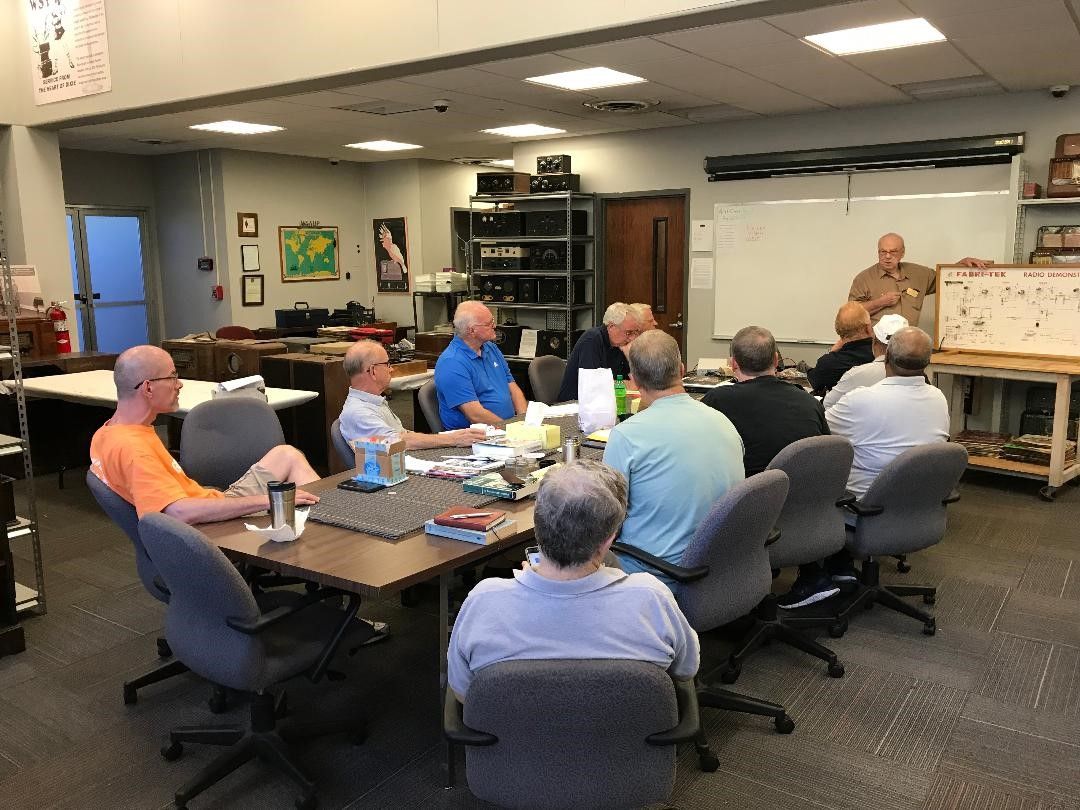
Joe Minor teaching an electronics class

Carroll Brooke receiving his beautifully restored radio from Doc Holladay & Tom Killian